The Making Of "Electricity Of Life"

Building And Windows
The building was the starting point. At first, I thought it would be simple - I would create a single cube, add pillars, and merge the object. But it turned out to be more complex than that.
True, I easily created a cube, and then cloned that to make pillars, which I shrank in X and Y and moved to the corners and the center point of the walls. Then I saved the object, and that turned out to be a wise decision.
Why? Because the roof and the base were not so easily made as I had thought. Once I merged the pillars with the main cube and then copied and pasted the result and shrank it in Z to make a ceiling, I realized that merging had been a serious mistake.
I needed the cornice to be larger than the building, but for proper appearance, the tops of the pillars also had to be larger than the pillars. Yet when I enlarged the roof in X and Y, the portion of the roof that was over the pillars did not enlarge, or at least much - it mostly moved outward. After many different attempts, I finally bailed that and brought back the original grouped cube and pillars. Multiselected, this expanded properly, and I had my roof. I decided to use this for the building core as well, just in case. I copied and pasted the roof for the first base tier, copied / pasted / Z shrank the core for the intermediate level, and finally copied / pasted / Z expanded the first base tier for the bottom tier of the base. Then I went to work on the bricks.
I used the old Pro-Textures bricks, because they had more bricks than the Snap Maps bricks and were less likely to repeat. The only problem was that they were orange, so it took a lot of work with the ImageFX change color operation to get a good dark brick with a greyish mortar for it. The result, however, was a near perfect match to the patina of the mill complex bricks.
The concrete texture resulted in something which looked a lot more like granite, but that was fine for the cornice and the base.
I then created a copy of the core cube and shrank it slightly in X and Y. I also expanded it in Z so that it would create a hole in the floor. Then I used it to cut the hole in the core. Becuase the pillars were no longer merged with the core, this meant that the pillars were unaffected by the cut. Leaving the inner faces from the cutting cube in place meant that they took on a nice white color which contrasted with the brick texture of the pillars that were exposed on the inside. It also meant that a good thickness of building was left for later window cutting.
The windows represented the next challenge and turned out to require some of the most complex work of this modeling effort. Because final fit was going to be essential, I kept every intermediate stage of the window object.
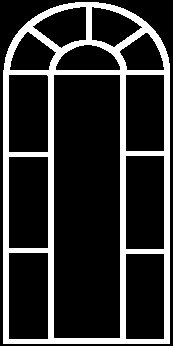
It started with a drawing in DPaint - two colors with a thick rectangular brush. The resulting outline was brought into Imagine using Import IFF ILBM. Imagine converted the surfaces of the drawing to faces and left me with an object. Well, not a perfect object - actually, the facing process aborted only partly finished, and many of the faces it created were irregular due to the artifacts in the bitmap. So I completed the facing of the windowframe by hand. The resulting object was then saved, and then extruded and saved as another object which would be the actual window frame. I went back to the flat / faced frame and deleted all of the interior points. Then I refaced the outline. This would be the shape I would use for the glass, and also to create the necessary holes in the building core.
I made the glass and then extruded the outline to make a punch for the hole cutting. Then I created three copies and inserted them through the building and made the cuts. It turned out to be important which order the cuts were made, and I suspect the problem was exacerbated by the fact that the walls were single rather than multi-unit planes. But after several false starts, I finally had what I needed.
I used the faced outline of the window to make glass and grouped it with the window frame. Because all of the windows had been scaled to match the building from the beginning, the combined glass and frame fit perfectly into the holes I had made.
 |
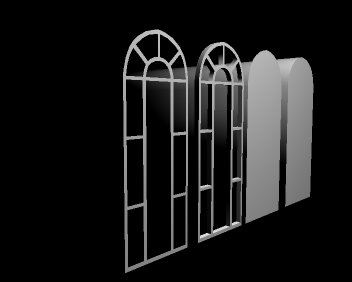 |
| Window bitmap as drawn in DPaint | Window objects |
A floor plane finished the initial work on the building.
| The building seen from the top, showing the pillars. |  |
| Building with window holes |  |
| Building from top showing actual location of the pipes. The camera location will be to the upper right looking roughly toward the center of the building |  |