The Making Of View From A Height

"View From A Height" required two 3D programs to produce its effects. The excellent terrain creation and multitude of preset textures of Bryce, and the spline editing / shaders of Carrara.
| This is the first terrain image. Unfortunately, I failed to save the various prior stages, because I was just "fooling around" and didn't actually intend to produce any specifically worthwhile artwork. However, it began with a generalized fractal terrain that was then eroded, smoothed, reroded, raised, and finally painted to flatten the center of the resulting mesa. |
 |
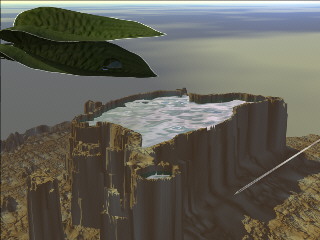
| This image of the mesa with one of the earlier textures applied was interesting, especially since the texture selected offered a sort of "fog-like" atmosphere to the shaded side of the mesa. I also liked the "building-like" profile that had resulted. This texture was projected from the side, which led to the rather nice layering effect. |
 |
|
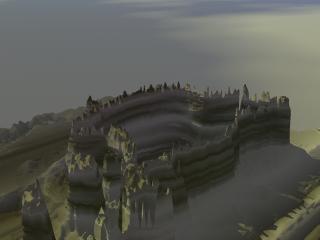
A look at the top, however, shows that the top of the mesa is not realistic. Though I liked the look from above, this image clearly showed me that I needed to do something with the upper surface. Which is when I thought of making it hollow. |
 |
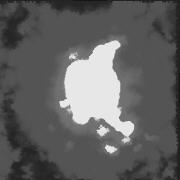
| This terrain image shows how I made it hollow. I exported the terrain (using the terrain editor image "copy") and (via paste) used an image processing / paint program to turn the central areas to black. I also did the same in the southeastern outlier. Then I copied the image back to the clipboard and pasted it into the Bryce terrain editor. |
 |
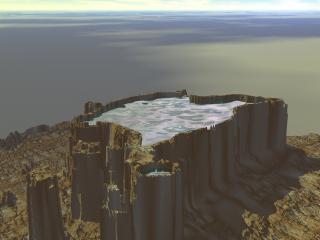
| The new look resulted in this top view, which was rather exciting, but which, because of the stratification, tends to obscure some of the dimension to the interior. That observation led me to consider filling the terrain with water. But how was I to create a surface of the appropriate shape, given the complex geometry of the hole? |
 |
|
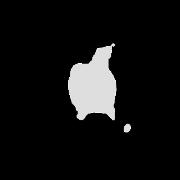
The answer was to use another terrain, not a surface, and to base the terrain on the hole. In fact, I took the mesa terrain into my image processor, filled the greys with white, upped the contrast, then inverted the image, so that what had been the hole now became an abrupt mesa of exactly the same shape as the hole. To ensure registration, I duplicated the mesa terrain, then edited it with the terrain editor, where I pasted in the image to the right. That changed the shape to that indicated, while keeping it perfectly centered on the existing terrain. |
 |
| More work with the materials editor finally brought the image to completion. The final materials are based on Technorock4 for the rock (I believe starting from a Sandstone) and Waves2 (I believe starting from Foamy Seawater) for the water. |
 |
| At this point I thought I might be done, but shortly after finishing the image so far, I was out for a walk around the house, where I saw a very pretty leaf covered with beads of water after a long hard rain, gleaming in the sun. I decided to try to model it, so I plucked the leaf and brought it in for a scan. I also created a mask for it, so that I could make the area around the leaf transparent. The tutorial for Voyage of the Ferns discusses creating such masks for complex leaf forms. In this, case, the original scanned leaf background was floodfilled with white in Photoshop, using a 33 similarity. Then some touchup was done by hand. Then, for the mask, the image was greyscaled, contrast was increased to a maximum, and the remaining details in the leaf were painted over by hand. | 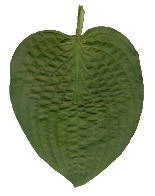
 |
|
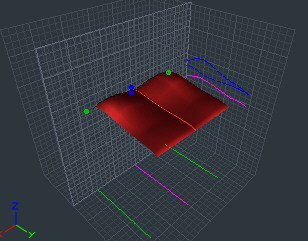
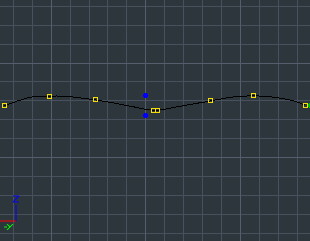
Originally, I had thought I would do the leaf in Bryce, so I could easily add it to the mesa I had created. However, because Bryce doesn't support deformers, splines, or vector construction (which might allow folding), I realized that I would be stuck with a flat leaf unless I worked somewhere else. Therefore I decided to move to Carrara and use the mesa as a backdrop. The spline editor view to the right shows the geometry developed for the leaf. |
 |
|
The seam at the center is actually a little more complex than you might think, consisting of two closely spaced points. All cross section points (there is only one cross section) are spline points. The center seam neatly matches the center vein in the leaf.
|
 |
| A fair amount of fiddling was needed to get the correct extrusion envelope shape for a side view of the leaf to show the primary vein plunging downward. The Extrusion Envelope Free. |
 |
|
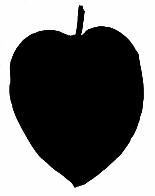
The resulting surfaces from the top are shown to the right. The color image was merged into the shader with white is transparent turned on to omit the white background. The mask was merged into the transparency channel. Note that the resulting image has a white border, not visible in this representation. This is apparently a consequence of a special behavior of masking in Carrara, for which there is a complex technique to overcome, which I did not use, since I decided the border looks fine for this type of leaf. A second leaf was duplicated from the first and carefully rotated and lowered to make the secone appear below and shaded by the upper. A fill light, slightly yellowed, low in brightness, was used to get light between the leaves. |
 |
| Next came the water drop, nestled in the lower leaf, where the obviously harsh sun couldn't reach it. That started life as a standard sphere and was jumped to the vector editor. There, the bottom was sliced off by marquee selecting and then deleting the points. The bottom row of points was selected and shrunken in the left and front views, then fill polygon was used on the same points. A modified water shader was applied. |  |
|
Finally, I needed to create the aircraft and its contrail. I expected this to be fairly simple, and it turned out to be very hard. The aircraft was a simple flattened cone, since it would occupy very few pixels, and the geometry of the contrail was of a simple flattened cylinder. The material turned out to be the most difficult part. Finally, I settled on a cloud lanes type of texture, which seemed fairly close. The right combination of transparency and variation was needed, and the contrail had to be able to appear to start slightly behind the aircraft, without being too abrupt. As a bonus, the selected texture formed into a multiple line, just like a multiple engine contrail. |
 |