The Making Of After The Expedition

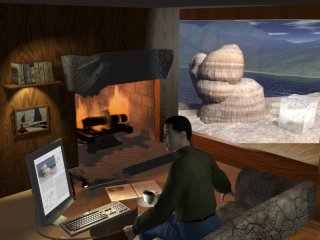
"After The Expedition" is the second in the Expedition diptych, using the image of the first ("Time to Work") as a picture hanging on the wall of the room, and the figure featured in the foreground of the first as the sitting figure on the sofa. It also uses the "Glacial Erratics" image as the view out the right side of the room.
The Sequence Of Development
This table shows the stages in the development of the image. As you can see, it was not exactly a straight line...
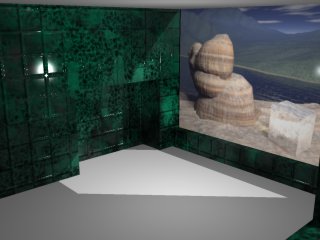
Prior to the images shown, the room was created as a cube; the core, the right hand window and a fireplace were cut out (a tutorial on 3D Boolean operations in Carrara discusses some of what I learned). However, initial attempts to place the camera where I wanted it in the room required an unacceptably distorting wide angle lens to show the amount of the room I envisioned needing. So I then also cut out the rear left section of the room walls to allow the camera to be slightly outside the room, and I positioned the production frame so that the edge was almost not visible, intending to change it to be completely invisible later. However, I eventually decided I liked the additional diagonal, so I left it in place.
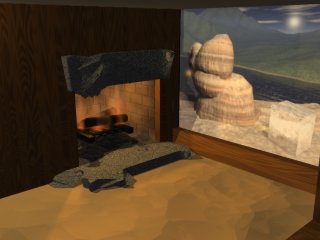
| This first image shows the room in what is almost its basic form. In this initial attempt, I believed that glossy green marble tiles would offer an interesting look. It was interesting, but it was so strong that the image shown on the right wall was overwhelmed. There is a light in the middle of the room, and a light outside the room which passes through the "Glacial Erratics" image (image created with Bryce), because the block on which that image was placed was set to cast no shadow - a property used later to good effect. |
 |
|
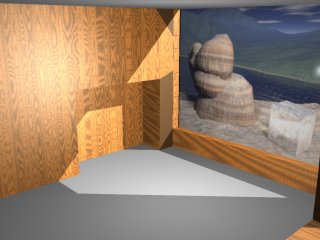
To calm down the walls, I next tried a texture I had created for my wife to use as a hardwood floor in a miniature house she was constructing. The wood uses the Lumber Yard shader plug-in from Lost Horizons Software. This worked better with the right wall image. Note the artifacts on the right side of the fireplace. Those were from the boolean operations and made it clear that I needed to do some work to finish cleaning up after the boolean operations that had cut the fireplace. See my tutorial on Carrara 3D Boolean operations for more on that subject, and on how this was fixed. Though not visible at the size of the image to the right, the texture also has a bump channel with bricks used to make the hardwood panels. That was later removed, because it generated some artifacts on the floor beam to the right. |
 |
|
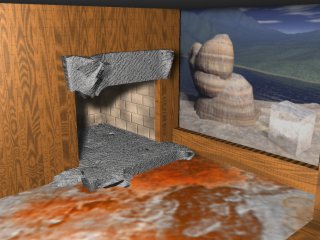
The fireplace wasn't deep enough, so I cut through the back of it and then made a hollow cube as the firebox - a cube that was notably deeper than the wall itself. The cube was not booleaned. It was simply taken into the vertex editor and the diagonal edge crossing one face was deleted. That eliminated any problems with the texture mapping. The texture map of the firebox was a firebrick colored base color, mixed through a cellular blender with a black value. You can see that the interior light has been shifted toward the wall. This gives the image a sort of "flashbulb photo" kind of look that may be useful in other images, though it wasn't what I wanted for this one. I used a terrain to create the complex mantle shape, which provides the sort of combination of natural and artificial look that I enjoy in home designs. I converted the terrain to a vertex object, and, in the vertex editor, used "Add Thickness". Once the desired object was created and positioned, I duplicated it and lowered it to the floor to make the base of the fireplace. The "carpet" didn't last, however. |
 |
|
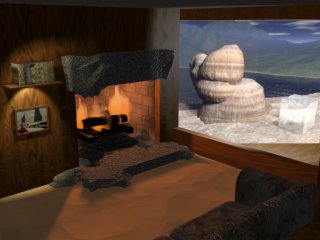
The light, now next to the wall, is used just to cast light on the mantle and the floor. The color has been yellowed and the intensity diminished. The next task was to create the fire. Three volumetric flames from Lost Horizons Software were imposed on two properly sized and textured "logs" (seed 600, type hemisphere). A terrain was used for the pile of ash under the logs. A bulb light was placed in the firebox to cast light out into the room. Finally, the carpet was calmed with a warm color and a cellular texture. |
 |
|
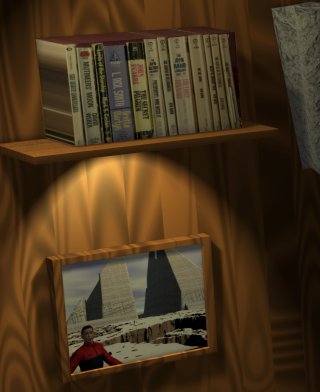
Several changes were made here. First of all, the fire was strengthened, using the Threshold parameter (simply turning it on was enough). A variation in the Phase of the flames was used to cause them to vary more. First, the light was moved to a better location, slightly out from the wall. Next, a bookshelf was created. This was done by gathering a number of paperbacks and holding them together, spines down, on my scanner. The resulting image was mapped onto one face of a stretched cube. By now, I knew that this image was going to try to carry out the theme suggested in "Time To Work". So I brought in that image and hung it on the wall, with a special tiny spotlight of its own. Later, I knew, I would add the character. Finally, I wanted to make the "Glacial Erratics" image look more as if it were a view, than as if it were an image on a wall. So I rotated it to face the camera directly. In order to prevent losing a large segment of the image because of the perspective-driven shape of the opening, I added matching floor and roof areas. To add a final touch of reality, a non-shadow-casting light was placed in the image, and set to a range and falloff that led to an appropriate amount of light being cast on surfaces around the opening. |
|
|
The final image adds many elements, including a glass table, papers based on text from a book on glaciation in the White Mountains of New Hampshire, the computer screen (based on similar pages and the first draft image for "Glacial Erratics") and keyboard (obtained from 3DCafe), a coffee cup and saucer from the same source, a lamp from the Carrara library, and a figure created in Poser - same figure that appears in "Time To Work". The figure was exported from Poser as 3DS and imported into Carrara. Additional lights were added to the table lamp, the computer screen (a wide spot directed perpendicular to the screen), and off screen behind and to the right of the camera. All of the lights were set to low intensity, short range, and rapid falloff. The image was rendered at 6400 x 4800 in order to provide the best possible anti-aliasing for sensitive areas such as the books and the text on the pages and screen. It was slightly contrast enhanced and resampled with Corel PhotoPaint 9. |
|
Only minor post processing was performed. A portion of the skin map (Paul Letham's paulskin) did not meet near the ear; and the Poser 4 turtleneck figure did not properly close at the back of the neck.