The Making Of "The Brick Moon"

Introduction
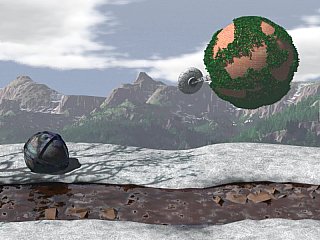
"The Brick Moon" began years ago as a work on paper in pastels. Now, I believed, I could do better with the resources of Imagine. I think I was right...
The Components
This image used a background image, created in World Construction Set (whose creation is described in another Workshop article), texture mapping, particle systems, filters, transparency, latticizing, and textures. Areas of special interest are outlined below...
- The Brick Moon itself - a spherical texture map, a particle system for leaves, and a latticized antenna base.
- The foreground snow and melt-stream - a particle system for rocks, noise and ripple textures for the water, and extrusion to path for landscape contours.
- The ball - a tasty color map to generate the impression of age and corrosion.
- The tree shadows - a filter plane.
- The scene - fog / haze, the background image, and cohesion.
The Brick Moon
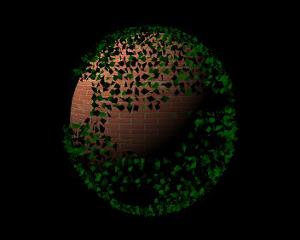
The brick moon is a sphere with a patchy covering of leaves. There's nothing terribly novel about the sphere, except for the inability to scale the texture, which requires that the image map be sized in an image processing program. I used the excellent ProTextures brick bitmap for the surface texture.
| The leaves, however, were a different matter.
At first, I tried just duplicating the inner sphere, enlarging it, and making
that duplicate into a particle system. Unfortunately, the resulting particles
were too coarse. I found I needed a 96 x 48 division sphere to get convincing
leaves at the required scale. I used my own object for the leaves, as described
in my workshop article on "The
Making Of The Electricity Of Life". This helped reduce the memory requirements
for the leaves, since each leaf then was a mere two polygons, and the bend
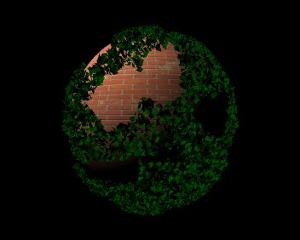
in the leaf object added a certain amount of shadowed texture to the foliage. Also, as you can see, random placement and sizing was also important. The first image shows the too regular results when this is ignored. The random placement is attained with the use of th e To make the patchiness I required for the foliage, I put the particle sphere into point mode, and used the lasso tool from several perspectives to select and delete polygons. It took some experimentation to generate a result which had approximately the correct number of openings. It took a little more experimentation to find exactly how much larger the foliage sphere should be to suggest that it was just above the surface of the brick. |
  |
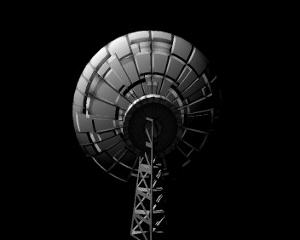
| The next task was the antenna. I decided
against making it a member of the sphere group, because I wanted to leave
open my options to attain the best placement when working in the Stage editor
later. But I left the sphere in the Detail editor to make sure I kept the
antenna to scale. The dish was fairly simple. I created a sphere (no stagger points) and, in point select mode, used the rectangle select to select and delete the upper 2/3 of the sphere. Instant dish. Then I applied a Radial Death Star texture to suggest panels and wear on the dish. I experimented with positive inter-panel bump sizes, to try to suggest the sort of ribbing often used to strengthen such dishes, but quickrenders at near and closer than the anticpated rendering scale showed that these were confusing and unconvincing. A cylinder at the rear of the dish was used to suggest a mounting point and equipment location. I used an Iris texture to create the appearance of dark, radial ribbing with a white center at the rear (the side away from the dish) - this on top of the Radial Death Star. Next, a four sided cone was used as the basis for the dish support. The cone was latticized, which made it look like girders. However, the impression would not stand as well with a closer rendering, since latticizing does not take into account where two polygons meet at a zero degree relative angle (to be strictly correct, the latticework should be only half as thick along those edges). I also took the "dish-side" of the pylon, and flattened it by dragging the points inward until they were in line with the edges. A copy of the support structure, suitably scaled, was placed in the dish as a transciever support, tipped with a cylinder. I didn't put a lot of work into this, since I did not envision it would be visible in the final scene, but I also considered that I would probably be reusing this object in the future, so a little extra work was justified. |
 |
At this point, the brick moon itself was essentially done. Now it was time to turn to a more challenging area...
The Stream And Its Banks
This was, perhaps, the most tedious and trial and error part of the project. I had a clear idea of what I wanted at the start, and it didn't come out the way I expected.
| I began with a scan of some real dried grass and a faced shape created by moving the points of a disk. I extruded the shape along an irregular and sinouous path to create the base shape of the ground, and used the grass as color and bump map. | 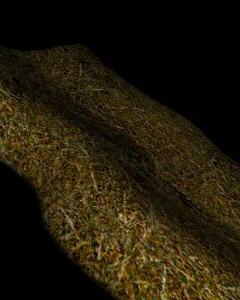 |
| Next, I filled in the depression with a water plane. The water plane was set with the appropriate filter (255,255,255 - let all light through) and a low reflection level and specular highlighting with hardness of 255. A wrinkle texture and a noise texture were used to provide the broad and local wavelets. This same technique was used in "Escaping The Fire". where the water was much closer. Then, below the water plane, but close to it, I added the broken rock plane, a brown plane with numerous polygons, particalized with random shapes and random sizes, and with a dirt texture added. | 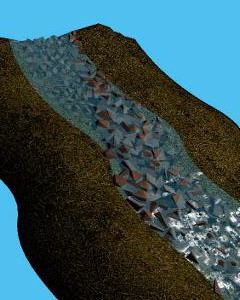 |
| The rock exposure was too even, so I rippled the plane. This worked fairly well, but it was clear that too much of the rock was exposed in the clumps, so I had to tediously experiment to get the proper depth. This is one of those not quite right. | 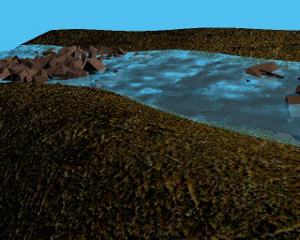 |
| The color of the grass was too dark and yellowed. I tried some experiments to improve the look, by lightening it. I also found that the banks were not clearly enough delineated. So I used subgroups to set the stream bed and banks to a darker color and dropped the brush from them. Because of the shape, this was difficult and required a lot of piecemeal selection and addition to the subgroup. This was done by selecting the subgroup and then selecting other polygons and then doing a "make subgroup". | 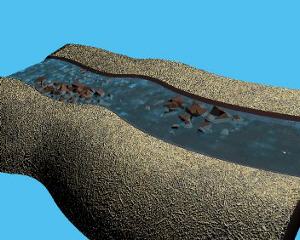 |
| An attempt to improve the landscape with positive crumpling was also a failure, as you can see. | 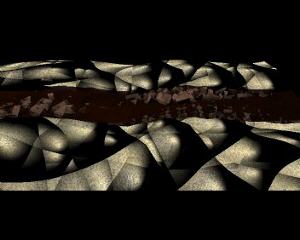 |
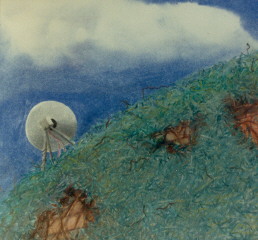
| But one of the renderings made me realize that the surface looked like snow. I greyscaled the grass image, removed the bump map, and suddenly I had very nice snow, with a slightly melted look to it, as you can see in the final image. | 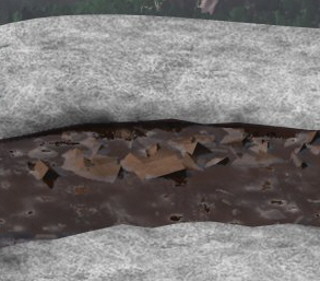 |
Surprisingly, I hadn't thought of snow originally. But it was the perfect way to tie the foreground to the snow in the background. Serendipity, I think they call it...
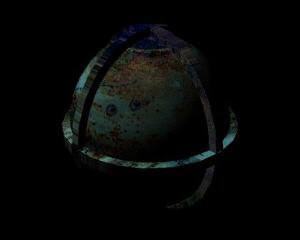
The Ball
The ball came in as an object after my first experiments, which used a cedar tree, failed to attain the desired look. The cedar was just too dominant. So I decided to use a very nice surface photo I had taken and create a smaller, interesting object. I decided to use a sphere, and capitalize on the similarity and difference between it and the brick moon, allowing for the suggestion that the two were somehow related - a mystery which is an important part of the appeal of an image like this.
| The image is a photo which I took while waiting for a friend in an old industrial park. Every area of nature and human endeavor has nice surfaces like this, just waiting for the computer graphics artist with a camera. |  |
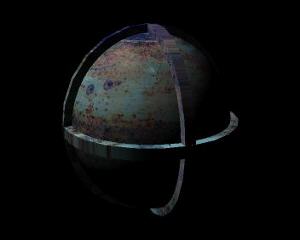
| When first wrapped around the sphere, the
result was too dark. A second rendering after the image had been brightened
shows a clearer appearance. Also notice that the image is projected onto the flat surface of the disks, which suggests milling at the edges of the disks. |
  |
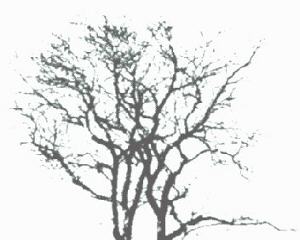
The Tree Shadows
There's something about tree shadows in general, but especially tree shadows across snow, and across objects in or on snow. That was something I wanted to use in this image, especially with the demise of the cedar. I needed an organic suggestion to bind the foreground to the foliage in the midground and the landscape in the background.
I experimented with the filter plane I had used for the background in "Electricity Of Life", but it mostly served to show me I was on the right track. However, the top was too sharply cut off to be natural looking. So I went for another photo, and used the techniques I had developed for "Voyage Of The Ferns" to create a good silhouette. Experimentation showed that a black shadow was too dark. So I lightened the silhoette, blurred it with Gaussian Blur, applied it to a plane as a filter map, and found the right place for the filter plane to catch the scene illumination.
Atmosphere
Finally, to add a sense of atmospheric depth, I decided to use global fog. Some experimentation gave me a value which worked for the sphere, but it added what I thought at first was an unwarranted amount of haze to the background image. Later, however, I accepted it as a realistic appearance, given that I was suggesting a warmer day where the snow was beginning to melt in mountain country. One item of speculation, however - I have been unable to determine how far away Imagine thinks the background image is. If the background image is as far away as the edge of the universe, that distance will vary if you add or remove objects from the scene during an animation. Therefore - be wary. You may need placemarker objects to prevent this variation.
Conclusion
An image like this offers mystery, ambiance, and a suggestion of symbolic content. The beauty of the objects and the natural balance of the composition shows how well ray tracing can complement artistic insight. And the results are so much closer to my original internal vision than the pastel work ever was...
I hope you enjoy it as much as I have.
Oh, and in case you were wondering...
 |
|
|
The Original
|
The Modern Version
|