The Making Of "The Brick Moon Window"

Introduction
"The Brick Moon Window" extends "The Brick Moon", whose construction is described in "The Making Of The Brick Moon".
The reason was not so much spurred by an abstract intellectual concern, but simply a reaction to the challenge of attaining realism. After having seen a particularly beautiful 3D work that showed excellent texture and lighting qualities, I decided to do what I could with those qualities in my own work.
The Components
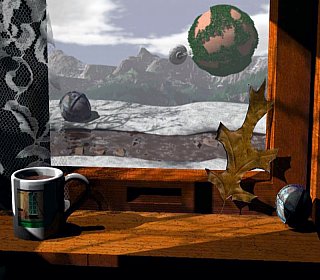
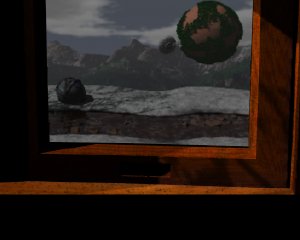
This image used "The Brick Moon" as its background. That image, of course, already represented the investment of a significant rendering effort. It then went beyond that...
- The window frame used image mapping and textures to create the basic aura of realism.
- Lighting, especially the use of multiple filter maps, added to the realism.
- Auxiliary objects, such as the oak leaf from "Escaping The Fire" and the ball from "The Brick Moon", and a cup made specially for this image, added shadows and complexity to the image, as well as working with the lighting to create the trapezoidal composition.
- Lace curtains completed the textural richness of the image.
- The glass offered a few problems of its own.
The Making
A window frame is something we take for granted in the real world, but in the computed world of 3D, a convincing window frame is a fair amount of work.
| The window frame grain was a scan of my hardwood floor, picked up with my portable Sharp JX-100 scanner. |
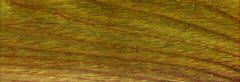 |
| Originally, I thought a set of rectangular beams would do the job, but I quickly found that I needed to mimic the method of real window frame construction to get the proper flow of the grain across the window. |
 |
| The window ledge was just as important as the window itself. It used the same wood, with an added dirt and scratch texture. Actually, several scratch textures with different orientations, all long and thin, were used. |
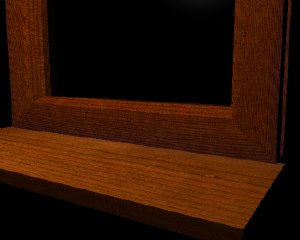 |
| Though the wall is never visible in the
final rendering, I didn't know that at the time. So I spend some time getting
a good texture and the perfect fit for the window. In fact, fitting the window frame parts together was a serious issue. I had to cut a hole in the wall smaller than the outer window frame, but not let it go beyond the inside of that frame. Also, this rendering was the final of a sequence used to ensure that the inner frame was tight against the outer frame. The outer frame was copied from the inner frame, but some work was needed to scale it properly and keep light from leaking through. Finally, note the slot in the window frame, which would allow it to be lifted. A slice operation with a half cylinder was used to create a realistic slot. |
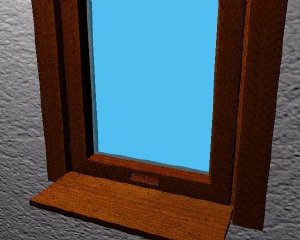 |
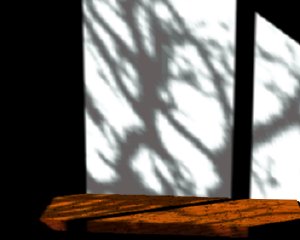
| This image shows the use of two filter
maps between the inside light source and the window. Note that, for the
purposes of the test, I temporarily inserted a white plane in front of the
window. This allowed me to see the parts of the shadow that would normally
fall on the window glass and be invisible, and made up possible to judge
what effect could be had by moving the filter planes up or down. Two separate filter planes were used, though the two might have been combined. I decided I wanted the additional flexibility of being able to independently scale the planes while setting up the composition. One plane was the one used for the tree shadows in "The Brick Moon". The other was made for this image, and was a black and white four paned window silhoette. |
 |
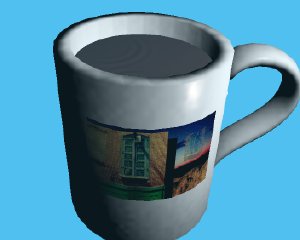
| A cup for the window ledge was essential.
After all, it's a cold morning out there. Note the presence of low level
bump noise to simulate the natural irregularity of the ceramic glaze and
its underlying clay. The handle is an extrude to path of a flattened oval, with the axes matching orientation to the path. A fairly large number of polygons (twenty segments) were needed to get the smooth appearance. The liquid, here uncolored, shows its "rain" texture rings. |
 |
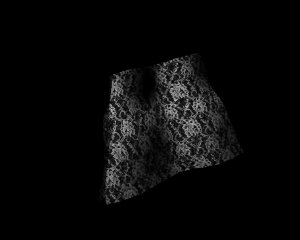
| The final touch was the use of lace curtains. The lace was scanned and made into a filter map (inverted, so that the light would not shine through the thread areas). |
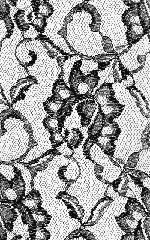 |
| Tests were run, including these two. One proved the lace would take shadows, the second proved it could be seen through. |
  |
| The final obstacle was the glass. Imagine glass is a little different from conventional glass. Where conventional glass does not reflect the absence of light, Imagine glass with a reflectivity above 32 does reflect a black background. As you can see in this test image, this significantly darkened the bright background image. Some experimentation was needed to find the correct reflectivity. |
 |
Conclusion
This image came very close to running out of chip ram. Apparently the bitmaps are still kept there in 5.14, and the duplication of the hardwood bitmap across all of the window elements was enough to run out of chip ram. I had to eventually eliminate the outside portion of the window, which, due to perspective, would be invisible, in any event.